Mother, daughter, sister, neice, cousin, and friend

Mother, daughter, sister, neice, cousin, and friend

Friday, March 09, 2012

You Pin It, I Try It #1


All that stuff on Pinterest looks so damn good, eh?  It's sooooooo pretty!!!!  That appetizing slice of taco pizza doesn't have lettuce and cheese falling off the sides everywhere.  That can only mean one of two things: 1)  There is not enough topping on the pictured slice; or 2) the photographer used some super-hold hairspray or something to keep everything in place.  OK, maybe 3) Their knives are way more sharper than mine.  Case in point:  
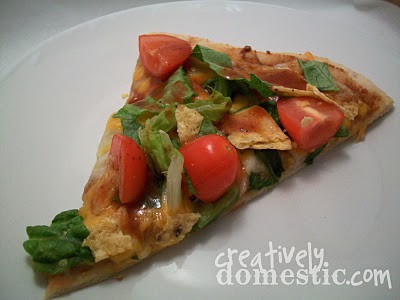
Seriously?


You know you see what I'm talking about.  All those beautiful photos on Pinterest coupled with the football shaped cake I made for a Super Bowl gathering inspired me to try things on Pinterest and then let the truth be known...whether it comes out looking like the Pinterest Picture, hereinafter referred to as "PP", or not. 

This first YPI, ITI blog is not my first or even second attempt at making something found on Pinterest.  But it did actually turn out looking like the picture, so I decided to start with it.   Mozzarella Sticks!!!  Sounds yummy!  I love Mozzarella Sticks!  I just hate that the store bought ones have so much sodium.  SPOILER ALERT: This is not the tastiest snack--a little too bland for my taste.  But, it's easy and quick and you make just the amount you need.

Here's the PP:

And we're off! What you need:

Egg roll wraps and the cheese sticks of your choice.  Oh, you'll also need oil and marinara sauce for dipping.

It's actually very easy to roll these.  Lay your cheese stick near one bottom corner of the wrap.  Fold up the bottom part and then tuck in the sides like so:


Since this was a test, I only made three.  I am not stupid and I figured I'd have to tweak the recipe and didn't want to waste food.
Next step:  Fry in about a half inch of oil.  It doesn't take long--really when one side browns, flip them over and by the time the other side browns the cheese will be melted.  

For your viewing pleasure:


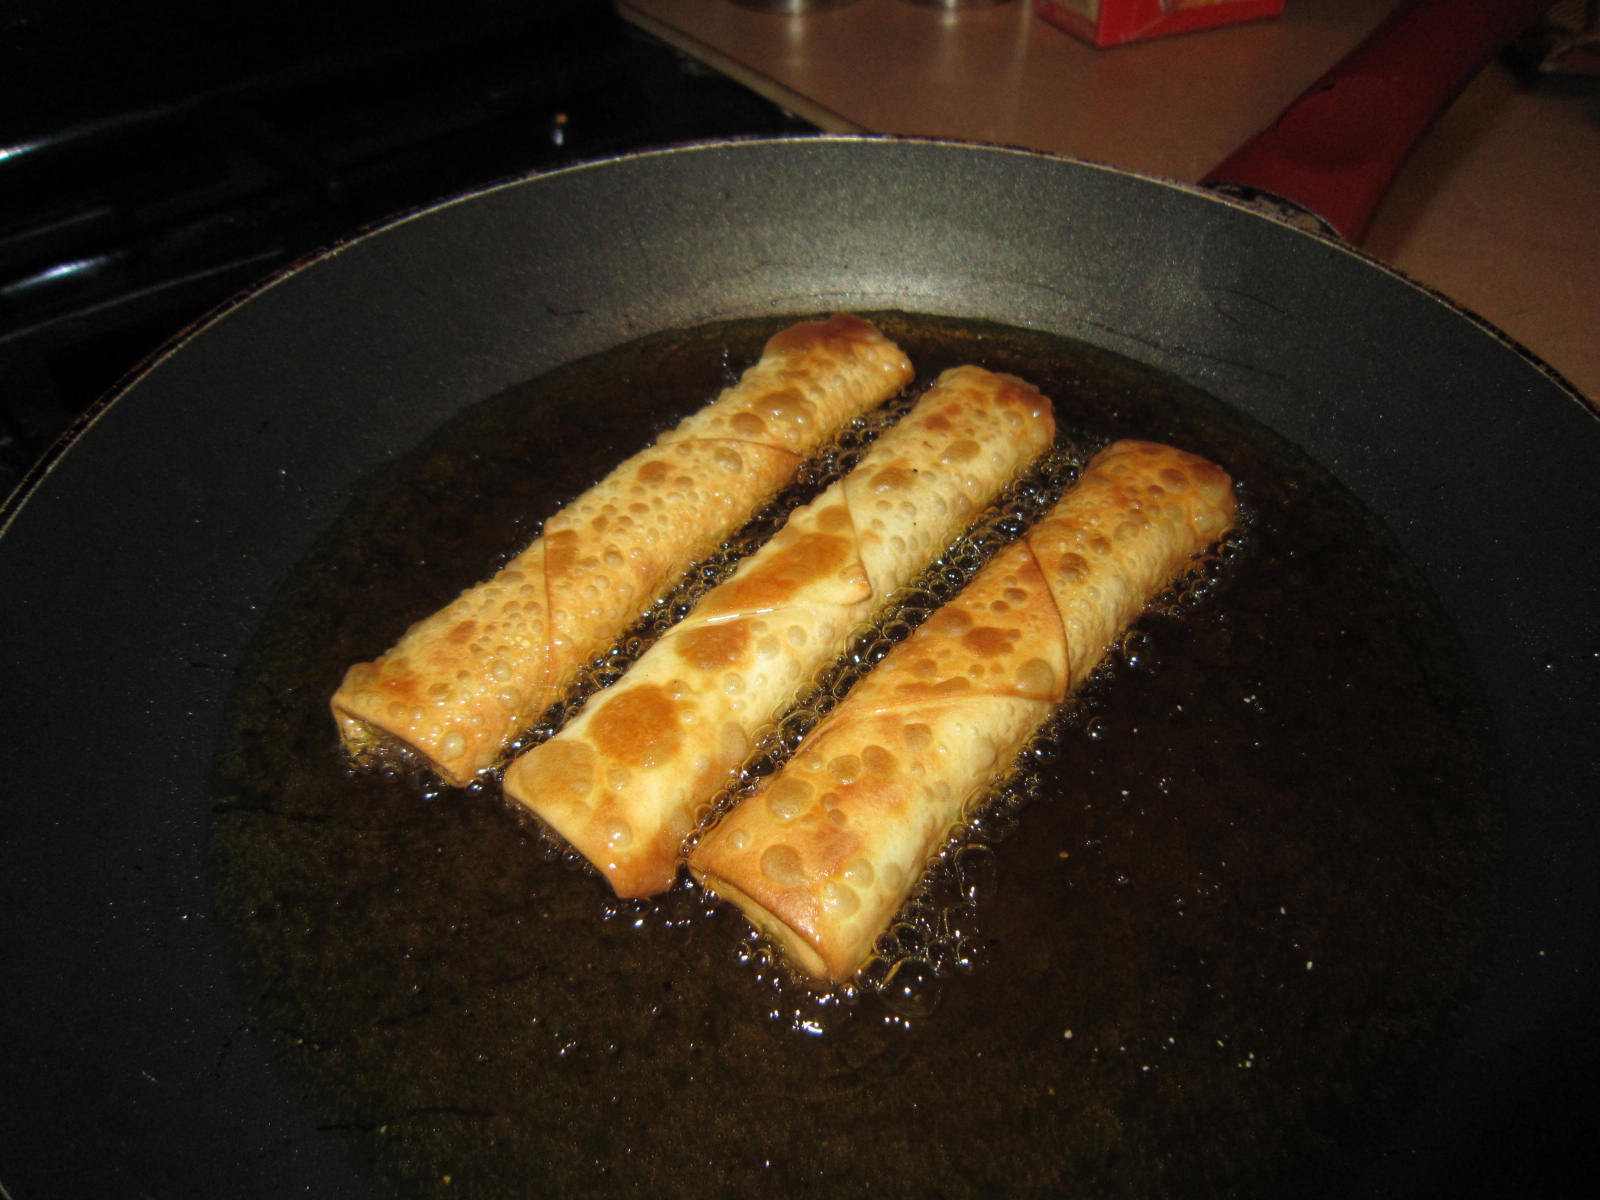
SEE!  I told you so!!!


And here's the final result!!!  Looks good, eh???  (Pay no attention to the burnt end.)  Read on...


These might be better with pepper jack cheese or sharp cheddar (but that may not melt as well) maybe by sprinkling some spice of your choice on the cheese stick before wrapping.  Honestly, a pinch of salt would have help tremendously.

As you can see, I don't have fancy colorful plates and bowls, like 99% of PPs have, in which to present my wares, so focus on the food.  The food! Not the plastic blue plate. 


So there you have it!  

Next up: Home made snickers bars!!

POLL:  Do you think mine will turn out this pretty?  And, more importantly, do they actually tastes like a Snickers bar?  I already know...


Wednesday, March 07, 2012

My Square Foot Garden Part 1!!

Welcome to Part 1 of my newest adventure!!!


Follow along with me as I create, sow, and harvest my square foot garden!  What in the world is a square foot garden, you ask?  It's just that-- a garden sectioned into one-foot squares so you can grow a bunch of stuff in a small space.  I'm keeping up with my expenses versus my grocery savings this summer and will give a full report in the fall.
Why would I do this?  Well, I'll tell ya--when I bought this house one of the things I was looking forward to was having a garden.  This will be my second summer in this house and over the past year I figured out that having a garden like my mamaw had--in the yard already present--was not going to happen.  This damn dirt is weedy and rocky and no good for tilling.  So, I did my research and found out that I could have an above the ground garden.  (Who knew that veggies roots don't actually very far down?  I sure didn't!)
So, first things first--I had to get some seeds started indoors.  What fun!  I got carrots, lettuce, broccoli, squash, zucchini, herbs, beans, cucumbers and spinach.  I used the standard Burpee box thingy with dirt included.  Let's take a look at pics from February 29:


Here's what I had a couple of days later:


A BEAN SPROUT!!!

Here's what they look like TODAY,  March 7:  


They are HUGE I tell ya, HUGE!!!!


Next, my pops had to build the garden box because I had to get the dirt ready for planting.  Why?  I heard from a friend that I needed to go ahead and get the dirt in the box and to start 'turning' the dirt weekly.  Why?  I have no idea, but my mama says it's so the dirt can get warm.
Anyway--pops had to build the box.  It is a 4ftX4ft untreated cedar box with reinforcements.    There was no map, instructions or guides, he's just clever like that. If you want a pre-made kit, we'll sell you one with all the wood cut to the proper sizes; all you'll need to do is put it together with included screws.  Seriously.   I moved it to it's designated spot in my backyard (the spot that gets the most light) and put that black stuff that is supposed to keep weeds out (but doesn't) at the bottom.  We'll even throw in the black stuff for FREE if you order a kit.


                        Viola!
**Anyone who knows me, knows I'm not good at math.  If I could do math I'd be a doctor instead of an attorney.  I say this so you understand why there are so many extra bags of dirt in the next set of pictures.  I thought a 4X4 would need 16 cubic square feet of dirt.  And as it seems, that is certainly true SO LONG AS the garden is a foot deep.  Mine is six inches deep, so I only needed 8 cubic feet of dirt.  

I actually used a combination of peat moss, top soil and garden soil and Zachary even pitched in to help:


Top Soil/ Peat Moss mix
Garden Soil

Whew, I'm all tuckered out!  (Pay no attention to the bags of dirt behind me.) 
Here are the empty dirt bags:  

I'm now in the waiting period to transplant, but I am already looking forward to harvesting my herbs and veggies!  

TO BE CONTINUED...

Next up:  You Pin It, I Try It #1!!!